
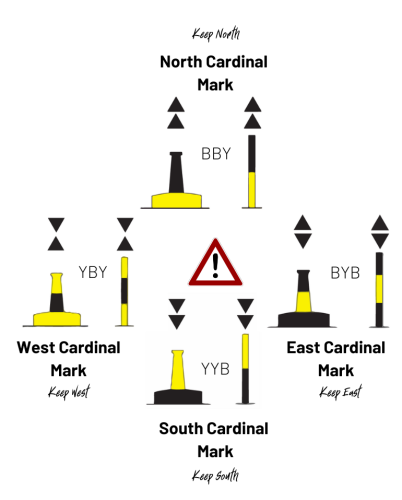
Buoys and beacons help to mark the “roads” and safe passage options at sea. There are six types of marks, cardinal marks, lateral marks, isolated danger marks, safe water marks, special marks, other marks (includes sector lights, leading lines etc). Learn how to recognise these bouys and what they mean both on a chart and when out sailing.
Lateral Marks
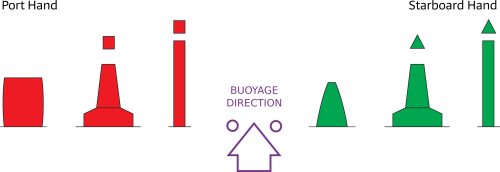 Each lateral mark indicates the edge of the safe water channel in terms of port (red) or starboard (green). These directions are relative to the direction of buoyage; in a harbour, the direction of buoyage is into the harbour from the sea. In New Zealand, Lateral Marks use red and green colours at night and during the day to define the port and starboard sides of channels respectively, when read in conjunction with the “Buoyage Direction” indicated on the appropriate chart. Modified Lateral Marks are sometimes used to show where a channel divides, and to indicate the preferred channel or primary route.
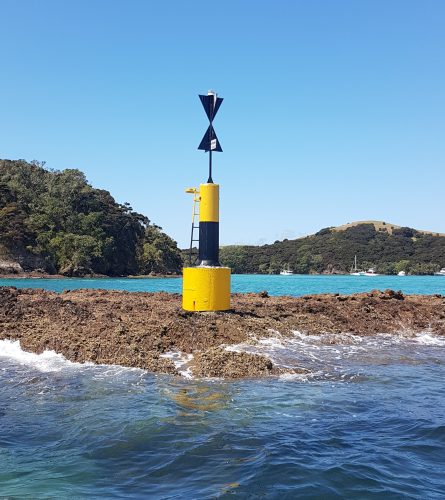 Cardinal Marks
 A cardinal mark shows that the deepest water in the area lies to the named side of the mark, or shows the safe side on which to pass a danger. The four quadrants (north, east, south and west) are bounded by the true bearings NW–NE, NE–SE, SE–SW, SW–NW, taken from the point of interest. A Cardinal Mark is named after the quadrant in which it is placed. Named Cardinals should be passed to the named side of the Mark (e.g. pass north of a North Mark).
Use of Cardinal Marks
Cardinal Marks: indicate that the deepest water in that area is on the named side of the mark; or indicate the safe side on which to pass a danger; or draw attention to a feature in a channel such as a bend, a junction, where a channel divides or the end of a shoal.
General Rules for Cardinal Marks
Cardinal Marks are normally pillar or spar. They are always painted in yellow and black horizontal bands and their distinctive double cone Top Marks are always black. The direction of the Top Cone Marks identifies the type of Cardinal Mark (e.g. arrows up north , arrows opposite east). The yellow and black bands differ for each mark, the Top Mark pointers act as guides (e.g. north cones point up, band on top and east cones are opposite, band in the middle).
Isolated Danger Marks
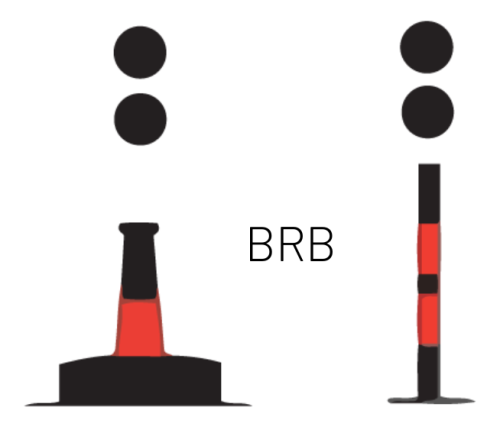 Isolated danger marks are placed on, or near to a small area of danger that has navigable water all around it. They have distinctive double black spherical Top Marks, a black base with red band and, when fitted, group flashing (2) white lights, associate Isolated Danger Marks with Cardinal Marks.
For more information download the Maritime NZ booklet – New-Zealand-system-of-buoys-and-beacons